原文链接:Hexo中Buttefly主题配置美化(六) | 偷掉月亮 (moonshuo.cn)

本次更改仅仅针对butterfly文件夹下的config.yml按照顺序进行更改

大家好,我是阿硕,专注于后端,略懂前端的一个菜鸟程序猿,今天教大家Butterfly的主题设置美化的设置。

自定义使用图标

选择图标

进入到阿里图标官网:iconfont-阿里巴巴矢量图标库

找到对应的图标,加入到购物车,发现购物车中已经拥有

image-20221101150025416

添加至项目,为了稳定性我们选择下载到本地,在butterfly文件的source/css文件下,将红色标注的全部移动过去,注意这里在移动的过程中我将iconfont更名为font,如果没有更名,下面的引用按照原来的进行

image-20221101154458094

添加外挂样式

在butterfly的config文件下找到inject标签,添加外挂样式
1
2
3
4
5
6
7
8
# Inject
# Insert the code to head (before '</head>' tag) and the bottom (before '</body>' tag)
# 插入代码到头部 </head> 之前 和 底部 </body> 之前
inject:
head:
- <link rel="stylesheet" href="/css/font.css">
bottom:
# - <script src="xxxx"></script>

在标签中进行更改引用

1
2
3
4
5
6
# social settings (社交圖標設置)
# formal:
# icon: link || the description
social:
iconfont icon-youjian : mailto:zss200101@qq.com || Email
iconfont icon-QQ : tencent://message/?uin=2105095848&Site=Sambow&Menu=yes || QQ

上面的主题的引用要与我们引入的同名称,这样才会生效

image-20221101154928027

引入成功之后,我们发现这个图标太小,在css文件更改大小,上面的更改对集体生效,而下面的更改可以仅仅对一个起作用

image-20221101155155933

注意我们的menu标签,也可以这样更改,更改为自己喜欢的样式

image-20221104215000253

查看效果

一定要注意引入之后,才会生效,现在博主正在寻找将这个颜色变为彩色的方法,单单通过css添加太过单调,如果能够引入文件原色彩那会更好,后续更新!!!

1
2
3
4
5
6
7
8
9
10
11
12
menu:
首页: / || iconfont icon-shouye
时间线: /archives/ || iconfont icon-riqi
标签: /tags/ || iconfont icon-biaoqian
分类: /categories/ || iconfont icon-fenlei21
休闲 || iconfont icon-xiuxian:
音乐: /music/ || iconfont icon-yinle
#电影: /movies/ || iconfont icon-dianying
书籍: /books/ || iconfont icon-shuji
#Link: /link/ || fas fa-link
关于: /about/ || iconfont icon-guanyuwomen

image-20221105144051017

高亮代码

这里仅仅按照highlight_theme作为介绍,拥有以下几种介绍,大家按照个人喜好选择一款即可

1
2
3
4
5
6
7
8
9
10
11
12
13
14
15
highlight_theme: light #  darker / pale night / light / ocean / mac / mac light / false

highlight_copy: true # copy button
highlight_lang: true # show the code language
highlight_shrink: false # true: shrink the code blocks / false: expand the code blocks | none: expand code blocks and hide the button
highlight_height_limit: false # unit: px
code_word_wrap: false

# copy settings
# copyright: Add the copyright information after copied content (複製的內容後面加上版權信息)
copy:
enable: true
copyright:
enable: true
limit_count: 50

社交页

在配置中social进行配置自己的信息即可,后续的图标设置参考上述的自定义图标,下面仅仅列出来一些举例

1
2
3
4
5
6
7
8
9
10
# social settings (社交圖標設置)
# formal:
# icon: link || the description
social:
#点击打开邮箱,发送法国邮件给下面的邮箱
iconfont icon-youxiang : mailto:zss200101@qq.com || 邮箱
#打开qq对话框
iconfont icon-QQ1 : tencent://message/?uin=2105095848&Site=Sambow&Menu=yes || QQ
#跳转到知乎
iconfont icon-shejiaotubiao-10 : https://www.zhihu.com/people/tou-diao-yue-liang-28 || 知乎

搜索功能

安装插件

执行以下的命令,安装插件

1
npm install hexo-generator-search --save

更改配置

打开主配置文件,插入下面的代码,配置根据自己的选择

1
2
3
4
5
search:
path: search.xml
field: all # post:文章范围、page:页面范围、all:覆盖所有
content: true # 内容是否包含每一篇文章的全部内容
template: # ./search.xml 指定定制的XML模板

打开butterfly配置文件

1
2
3
4
5
6
7
8
9
10
11
12
#这个搜索系统我们不开启,没必要用这么麻烦的
# Algolia search
algolia_search:
enable: false
hits:
per_page: 6
#开启本地搜索,即可我们正常的使用
# Local search
local_search:
enable: true
preload: false
CDN:

查看效果

image-20221105150008792

公式支持功能

安装插件

首先执行下main的命令,删除原来的自带的渲染插件,更改为合适的插件

1
2
npm uninstall hexo-renderer-marked --save
npm install hexo-renderer-kramed --save

更改配置文件

butterfly配置文件
1
2
3
4
5
6
7
8
9
10
11
12
13
# MathJax
mathjax:
enable: true
#这里设置为true,表示每一页都是需要我们这个js进行渲染的,会影响页面的速度,但是这样我们操作起来比较方便就这样写了
per_page: true

# KaTeX
katex:
enable: false
# true 表示每一页都加载katex.js
# false 需要时加载,须在使用的Markdown Front-matter 加上 katex: true
per_page: false
hide_scrollbar: false

查看效果

image-20221105152554973

本次插入了新的的插件,执行hexo clean清除一下,然后hexo g ,hexo s

图片的更改

给大家两张挑老婆的网站、

Top Wallpapers - wallhaven.cc

极简壁纸海量电脑桌面壁纸美图_4K超高清最潮壁纸网站 (zzzmh.cn)

注意我们图片最好的大小不要超过3M,否则会影响我们文章的打开速度,我们可以将图片进行压缩,而我们文章的封面大小最好不要查过1m,我们浏览的时候都是看到的是缩略图

window的图片压缩办法

这里仅仅讲述一个简单的方法,下面是老婆神子的一张图片,我们将这个双击使用window自带的图片管理器打开,我们可以看到这个10m

image-20221105202359354

现在我们选择调整图片大小

image-20221105202736772

选择第二个,并且进行存储

image-20221105202812532

我们可以看到大小大大的缩小了(存储的时候我更改名字了),而且画质变化不会很大,window知识适当的进行缩小,我们肉眼很难看出来差别,在CDN的加速效果下,我们速度可以快速到400ms左右(首次访问)

image-20221105202914966

根据给出的路径,我们找到自己网站的logo的图片,更改名称为favicon.png即可,放到如下的路径中替换掉原文件即可

image-20221105153207507

大家选择logo也可以去阿里巴巴进行选择,下载的方式选择为png即可,iconfont-阿里巴巴矢量图标库

image-20221105153745223

头像

还是和上面的规则一样,更改名称为favicon.png,放入到路径中,我们同样为了使得我们的图片也享受到cdn加速的效果,将头像作为本地图片,注意后续的照片为了加速效果都会放到这里,后续就不再阐述

image-20221105154755432

1
2
3
4
5
# Avatar (頭像)
avatar:
img: /img/avatar.png
#是否一直旋转
effect: false

主图配置

即我们首次进入到网站的时候,展示的页面,没错,是原神迷,我老婆的图片,主图的话我们可以允许照片占用大一点的空间,因为主图被放大,为了保证老婆的清晰度

1
2
3
4
5
6
7
8
9
10
11
12
13
14
15
16
17
18
19
20
21
22
23
24
25
26
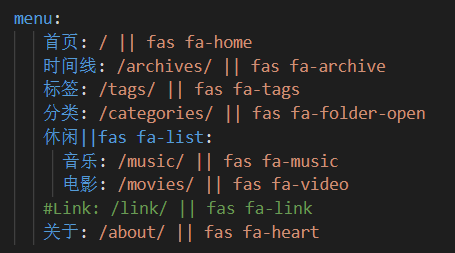
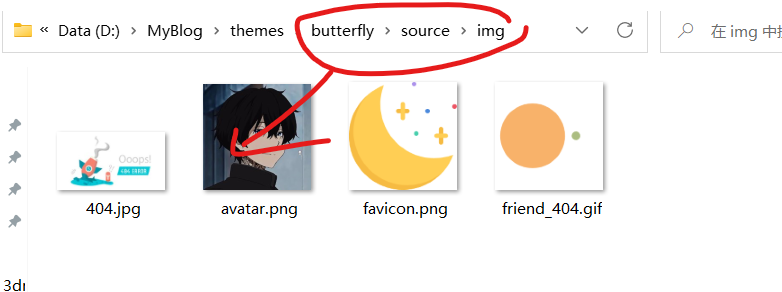
# The banner image of home page
index_img: /img/banner.jpg

# If the banner of page not setting, it will show the top_img
default_top_img:

# The banner image of archive page
archive_img: /img/archive.jpg

# If the banner of tag page not setting, it will show the top_img
# note: tag page, not tags page (子標籤頁面的 top_img)
tag_img: /img/tags.png

# The banner image of tag page
# format:
# - tag name: xxxxx
tag_per_img: /img/tags.png

# If the banner of category page not setting, it will show the top_img
# note: category page, not categories page (子分類頁面的 top_img)
category_img: /img/categories.png

# The banner image of category page
# format:
# - category name: xxxxx
category_per_img: /img/categories.png

image-20221105155244126

到这里可能有小伙伴问了,我们这里设置了每一个分类,每一个标签页的图片,但是我们的tags主页与categories主页都是原图啊

随机图片的匹配

1
2
3
4
5
6
7
8
9
10
11
12
13
14
15
16
17
cover:
# display the cover or not (是否顯示文章封面)
#首页是否显示文章封面
index_enable: true
#侧边栏是否显示文章封面
aside_enable: true
#归档页是否显示文章封面
archives_enable: true
# the position of cover in home page (封面顯示的位置)
# left/right/both
position: both
# When cover is not set, the default cover is displayed (當沒有設置cover時,默認的封面顯示)
#当我们没有设置封面的时候,使用以下的照片
default_cover:
- 图片地址1
- 图片地址2
.....

错误页面的匹配

1
2
3
4
5
6
7
8
9
10
11
12
# Replace Broken Images (替換無法顯示的圖片)
#在这里可以自定义所有图片不能显示的情况下显示的图片
error_img:
flink: /img/404.jpg
post_page: /img/404.jpg

# A simple 404 page
error_404:
enable: true
subtitle: '页面丢失,联系博主进行解决吧'
#图片的背景
background: 链接地址

文章信息显示

原作者已经写的很清楚了,大家可以挨个尝试一下

1
2
3
4
5
6
7
8
9
10
11
12
13
post_meta:
page: # Home Page
date_type: created # created or updated or both 主頁文章日期是創建日或者更新日或都顯示
date_format: date # date/relative 顯示日期還是相對日期
categories: true # true or false 主頁是否顯示分類
tags: true # true or false 主頁是否顯示標籤
label: true # true or false 顯示描述性文字
post:
date_type: both # created or updated or both 文章頁日期是創建日或者更新日或都顯示
date_format: date # date/relative 顯示日期還是相對日期
categories: true # true or false 文章頁是否顯示分類
tags: true # true or false 文章頁是否顯示標籤
label: true # true or false 顯示描述性文字

字数统计

1
npm install hexo-wordcount --save

配置

1
2
3
4
5
6
7
# wordcount (字數統計)
# see https://butterfly.js.org/posts/ceeb73f/#字數統計
wordcount:
enable: true
post_wordcount: true
min2read: true
total_wordcount: true

image-20221105213109702

页脚设置

其他配置

由于原作者的描述已经很准确,这里不做多余的阐述,仅仅说明一些可能会用到的配置,后面还有在线编译功能,但是需要服务器才能进行操作,爱开销比较大,这里就直接跳过,而对于步骤比较繁琐的美化,篇幅问题,会单独进行讲解

1
2
3
4
5
6
7
8
9
10
11
12
13
14
15
16
17
18
19
20
# Sponsor/reward,打赏图片
reward:
enable: false
QR_code:
# - img: /img/wechat.jpg
# link:
# text: wechat
# - img: /img/alipay.jpg
# link:
# text: alipay


# Share System (分享功能)
# --------------------------------------
#分享功能可以分享的图片
# Share.js
# https://github.com/overtrue/share.js
sharejs:
enable: true
sites: wechat,weibo,qq

后续更新