原文地址,阅读效果更佳:Hexo中Buttefly主题美化进阶续篇(十一) | 偷掉月亮 (moonshuo.cn)
大家好,我是阿硕,专注与后端,略懂前端的一个菜鸟程序猿,今天将为大家讲述Butterfly主题公告栏的设置。
原作者链接:Butterfly 主题首页增加公告 | realwds’s blog
作者的魔改:
适配了双栏的布局
增加了超链接设置,点击对应的公告即可进入到相应的文章
美化了一些样式,更改了与一些插件的冲突
轮播公告栏设置 声明:如果使用这个效果的公告栏,大家对于轮播组件就需要做出更改,Swiper Bar | Akilarの糖果屋 大佬的插件就不能使用了(否则公告栏会出现在轮播组件下面 ),要使用旧版源码魔改方案,但是博主的版本是4.5.0也可以使用旧版的方案
关于公告栏的设置,由于博主使用的双栏配置,而现在很多网上的教程都是关于单栏的,会出现兼容的问题,看来好久的源代码,终于改正过来,同时为了公告的可用性增强,所以重新花了一点时间学习了pug的语法,现在的公告可以点击对应的公告,就可以超链接到相应的文章
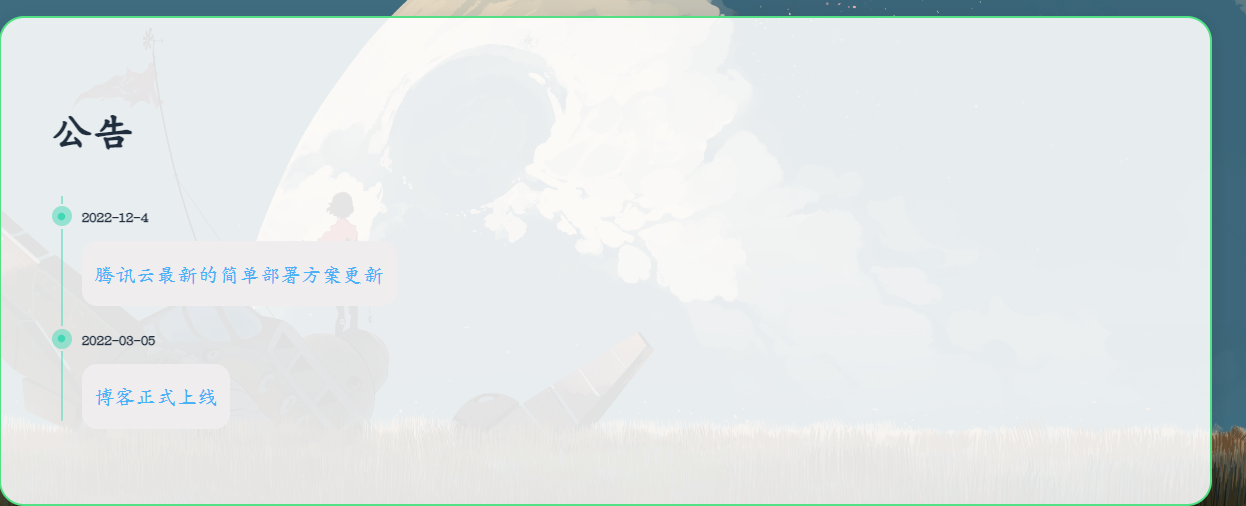
建立公告页 效果 建立themes/butterfly/scripts/tag/timeline.js文件,复制以下的代码
1
2
3
4
5
6
7
8
9
10
11
12
13
14
15
16
17
18
19
20
21
22
23
'use strict' ;function postTimeline (args, content ) { if (args.length > 0 ) { return `<div class="timeline"><p class='p h2'>${args} </p>${content} </div>` ; } else { return `<div class="timeline">${content} </div>` ; } } function postTimenode (args, content ) { args = args.join (' ' ).split (',' ) var time = args[0 ] return `<div class="timenode"><div class="meta"><p>${hexo.render.renderSync({text: time, engine: 'markdown' })} </p></div><div class="body">${hexo.render.renderSync({text: content, engine: 'markdown' }).split('\n' ).join('' )} </div></div>` ; } hexo.extend .tag .register ('timeline' , postTimeline, {ends : true }); hexo.extend .tag .register ('timenode' , postTimenode, {ends : true });
建立themes/butterfly/sources/css/_tags/timeline.styl文件,复制以下的代码
1
2
3
4
5
6
7
8
9
10
11
12
13
14
15
16
17
18
19
20
21
22
23
24
25
26
27
28
29
30
31
32
33
34
35
36
37
38
39
40
41
42
43
44
45
46
47
48
49
50
51
52
53
54
55
56
57
58
59
60
61
62
63
64
65
66
67
68
69
70
71
72
73
74
75
76
77
78
79
80
81
82
83
84
85
86
87
88
89
90
91
92
93
94
95
96
97
98
div &.timenode position relative &:before top 0 height 6px &:after top 26px height calc(100% - 26px ) &:last-child &:after height calc(100% - 26px - 16px ) border-bottom-left-radius 2px border-bottom-right-radius 2px .meta position relative color var (--tab-botton-color ) font-size 0.375rem line-height 32px height 32px &:before background rgba(68 , 215 , 182 , 0.5 ) width 16px height 16px border-radius 8px &:after background #44d7b6 margin-left 2px margin-top 2px width 12px height 12px border-radius 6px transform scale(0.5 ) p font-weight bold !important margin 0 0 0 24px !important .body margin 4px 0 10px 24px padding 10px border-radius 12px background #efeded display inline-block p &:first -child margin-top 0 !important &:last-child margin-bottom 0 !important .highlight background #fff7ea filter grayscale(0% ) figcaption background #ffeed2 .gutter background #ffedd0 &:hover .meta color #444 &:before background rgba(255 , 87 , 34 , 0.5 ) &:after background #ff5722 transform scale(1 ) div .timenode :before ,div .timenode :after content "" z-index 1 position absolute background rgba(68 , 215 , 182 , 0.5 ) width 2px left 7px div .timenode .meta ,div .timenode .body max-width calc(100% - 24px ) div .timenode .meta :before ,div .timenode .meta :after content "" position absolute top 8px z-index 2 [data-theme="dark" ] div &.timenode .body background #2c2c2c &:hover .meta color #ccd0d7 .meta color rgba(255 , 255 , 255 , 0.6 ) &.timeline p &.p &.h2 color rgba(255 , 255 , 255 , 0.6 )
引入公告模板 这里是重点,博主对原作者的代码做了一些改动,使得更加具有实用性,点击超链接即可到对应的文章,而且显示的更加全面
新建themes/butterfly/layout/includes/homeNotice.pug文件
1 2 3 4 5 6 7 8 9 10 11 12 13 14 15 16 17 18 19 #noticeList.container .nlogo ="公告" .swiper -container #notice-item.swiper -wrapper if site.data .notice each i in site.data .notice a (href=`${i.href} ` ,title="查看详情" ).li -style.swiper -slide=i.date +':' +i.msg a (href="/notice/" ,title="查看全部公告" ).i .fas .fa -arrow-circle-right .js -pjax script (src='/js/swiper-bundle.min.js' ,data-pjax='' ) script. new Swiper ('.swiper-container' , { direction : 'vertical' , loop : true , autoplay : { delay : 3000 , disableOnInteraction : true , } })
引入以下的css样式,在自己的自定义css文件中,在原作者的css基础做了一些变动
1
2
3
4
5
6
7
8
9
10
11
12
13
14
15
16
17
18
19
20
21
22
23
24
25
26
27
28
29
30
31
32
33
34
35
36
37
38
39
40
41
42
#notice-item { width : 100% ; height : 25px ; line-height : 25px ; } #notice-item .li-style { width : 100% ; height : 25px ; font-weight : 500 ; text-align : center; -webkit-line-clamp: 1 ; -webkit-box-orient: vertical; overflow : hidden; text-overflow : ellipsis; transition : 0.3s ; } #noticeList { width : 100% ; background : var (--card-bg); color : var (--font-color); margin-top : 1rem ; padding : 0.6rem 1rem ; border-radius : 12px ; cursor : pointer; display : flex; align-items : center; } #noticeList .nlogo { color : var (--font-color); font-weight : 600 ; display : inline; } #noticeList .swiper-container { display : flex; flex : 1 ; } #noticeList i { text-align : right; } .swiper-slide :hover { color : #1fc7b6 ; }
最终引入公告模板,打开themes/butterfly/layout/index.pug
无轮播图,直接正常的添加即可显示
1
2
3
4
5
6
7
extends includes/layout.pug block content include ./includes/mixins/post-ui.pug #recent-posts .recent-posts include includes/homeNotice.pug ....
有轮播图,include includes/homeNotice.pug在哪里,即决定了公告的位置在哪里
1
2
3
4
5
6
7
8
9
10
extends includes/layout.pug block content include ./includes/mixins/post-ui.pug #recent-posts .recent-posts include includes/homeNotice.pug .recent-post-item (style='height :auto;width :100% ;') !=partial('includes/sliderbar', {}, {cache:true}) +postUI include includes/pagination.pug
新建themes/butterfly/layout/includes/page/notice.pug,复制以下的代码
1
2
3
4
5
6
7
8
9
10
11
12
13
14
15
16
17
18
19
20
#article-container if top_img === false && page.tip h1 .page-title .page-title-has = page.title .page-title-tip != page.tip else h1 .page-title = page.title != page.content .timeline (class="notice") if site.data .notice each i in site.data .notice .timenode .meta p p =i .date p .body a (href=`${i .href }`,title="查看详情").p =i .msg
现在我们需要添加判断,避免渲染错误,打开themes/butterfly/layout/page.pug
1
2
3
4
5
6
when 'categories' include includes/page/categories.pug + when 'notice' + include includes/page/notice.pug default include includes/page/default-page.pug
执行以下的命令
并在新生成的index.md中关闭评论,设置公告标识
1
2
3
4
5
6
7
--- title: 公告 type: "notice" aside: false comments: false --- ...
最终新建source/_data/notice.yml,后续我们建立公告就这样建立(这里的source是在根目录下)
1
2
3
4
5
6
7
- date: 2022-12-4 msg: 腾讯云最新的简单部署方案更新 href: https://moonshuo.cn/posts/57170.html#加更 - date: "2022-03-05" msg: 博客正式上线 href: https://moonshuo.cn/
最终在主题配置文件中引入以下的css文件
1 <link rel ="stylesheet" href ="https://unpkg.com/swiper@8/swiper-bundle.min.css" >
hexo三连之后即可看到效果

